How to Add/Remove and Navigate Between Keyframes in After Effects
In our previous article – What are Keyframes in After Effects – we’ve discussed about what the keyframes are, what the CTI/Play-head is and more importantly what the stopwatches really are and what they are for. Adding the keyframes is something that we’ve gone over briefly while explaining what the stopwatches are in After Effects. So, let’s just dig a little deeper one more time for good luck’s sake.
In this article, you’ll learn about:
1. How to add and remove keyframes in After effects?
To add the very first keyframe at the current time, you need to click on the stopwatch attributed to the property (e.g. opacity) you want to animate. From that point forward, After Effects will start recording any change in the value that you make, in the form of a keyframe to let the animation (the change between any two subsequent keyframes) happen.
The S Bit Fun Fact:
Another way you can add a keyframe (after you’ve added the first keyframe that is) of the same value is by clicking on the Diamond icon to the left of the property stopwatch.
To remove a single keyframe, you can click on the keyframe and press delete. To remove a bunch of subsequent keyframes, you can marquee select the keyframes and press delete. And to delete selective keyframes, you can click on your first keyframe you want to delete, and then press Shift Key and marquee select the rest of the keyframes (or one by one to) have them selected and then press delete.
To remove all the keyframes, simply click on the (activated) stopwatch to deactivate it.
Which in turn gets rid of all the keyframes and leaves the property at the current time value.
Check out this article for more on Stopwatches – What are Stopwatches?
2. What is the Auto-keyframe mode?
Speaking of keyframes, stopwatches and the CTI/Play-head, there is also an option in After Effects that lets you turn the Auto-keyframe mode on. What the Auto-keyframe mode essentially does is that it allows After Effects to start recording keyframes right from the get-go. If the auto-keyframe mode is on, any change in the value of any property will add a keyframe at the current time (where the CTI/Play-head is) without you having to click on the stopwatch.

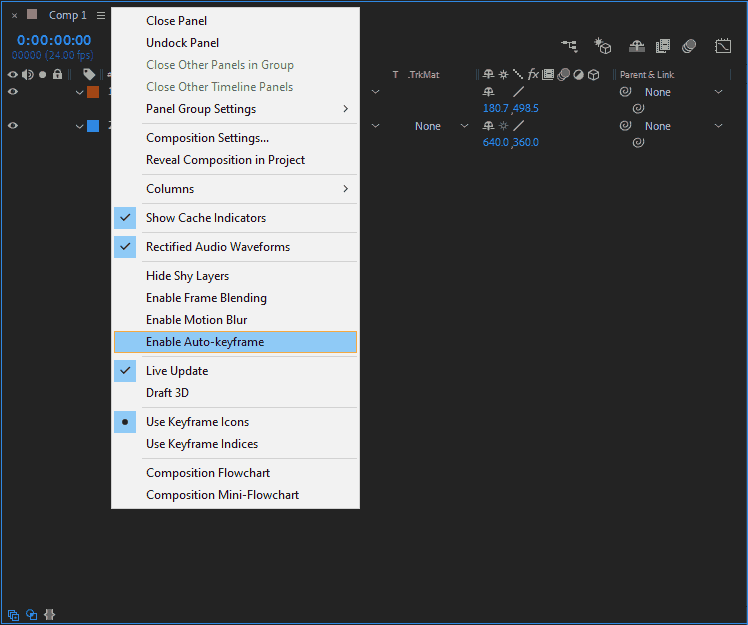
Auto-keyframe Setting in TImeline Panel Options

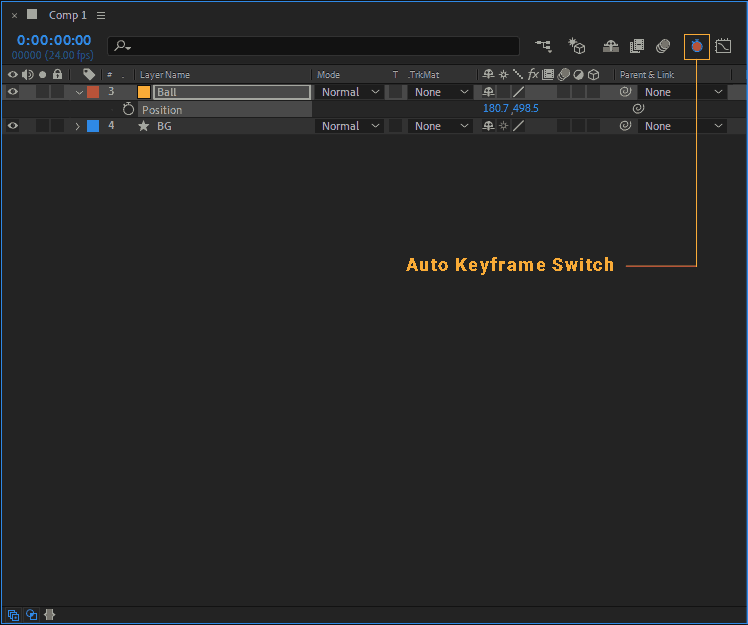
Auto-keyframe Switch Appears
The Auto-keyframe mode option is sort of hidden inside the panel options (settings) of the Timeline Panel in the later versions of Adobe After Effects CC. In-order for you to turn on the Auto-keyframe mode, you’ll need to go to the top left corner of the Timeline Panel (right to the comp name on the tab) and click on the Hamburger Icon (three horizontal lines) and choose “Enable Auto-Keyframe” option. Once the Auto-keyframe option is enabled, you’ll see a red stopwatch switch along with the other composition switches (As shown in the image Above).
There is a downside to the Auto-keyframe mode though. Once enabled, it won’t allow you to change the absolute value of a property. The workaround for that is to make the changes to the property (it will add a keyframe) and then delete the keyframe manually or click on the stopwatch. But it becomes really annoying when you don’t really need a keyframe and just want to change the property value but you’re getting a keyframe each time you try change it. So, my recommendation is, don’t use this option unless you really know what you’re getting yourself into.
The S Bit Fun Facts:
The Auto-keyframe mode does not activate the automatic recording of the keyframes for properties that aren’t interpolated. Those properties being checkboxes, menus, the Source Text property (which uses a Hold Keyframe).
A few of the tools, such as the Puppet pin tools, and Motion Sketch etc. automatically set keyframes regardless of the Auto-keyframe mode turned on or otherwise.
3. How to navigate between keyframes in After effects?
Working with the keyframes as you’re animating things in After Effects and going back and forth between a bunch of keyframes can be a little tedious. Especially when you’re working with a slightly longer timeline. Because what happens then, is that you’re intending to change the value of a certain keyframe and visually your CTI/Play-head is right on the top of it, but in reality, it is just a frame or two off it. You try to change the value thinking that that’s exactly what you’re doing, but you get a new keyframe just a frame or two before. Which makes your animation have sudden jumps in the movement or have glitches.
One of the ways not to run into such situation is to press and hold the Shift key, while you’re moving the CTI/Play-head in the timeline, to be on top of the keyframe you want to make changes to. But even that is a hit and miss sometimes.
Check out this section for more on CTI – What is CTI (Current Time Indicator)?
So, there are a couple of options that can help you be sure of the fact that you’re sitting on the right keyframe. But before we explore those option, here a quick little tip.
Khan's Quick Tip
Whenever you’ve got to move between keyframes on the timeline and make changes to their values, make sure to have timeline zoomed in on roughly about the area where the keyframe in question is. You can do that by placing the CTI/Play-head about there and pressing [Plus (+) key] several times to zoom in and pressing [Minus (-) key several times to zoom out]. Or by clicking and dragging the Timeline Zoom slider at the bottom of the timeline.
– Using the Keyframe Navigator:
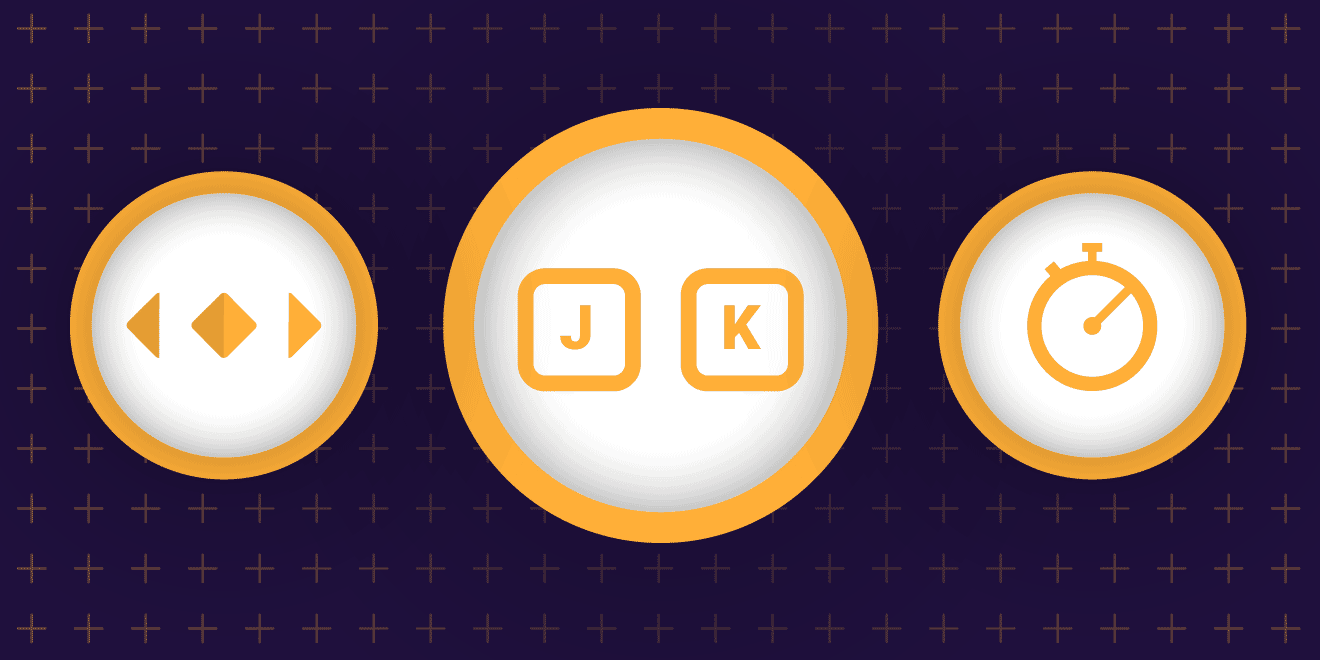
As soon as you’ve added a keyframe, to the left of the stopwatch there will appear the Keyframe Navigator. The Keyframe Navigator consists of 3 – icons where the side icons (Right and Left arrows) will let you navigate to the next and previous keyframes. The center icon (the keyframe icon) will let you add a keyframe at the current value and current time.
– Using the Keyboard Shortcuts:
Moving and navigating between the keyframes is something that can also be done using the keyboard shortcuts. The shortcut keys used to move the CTI/Play-head forward and backward in time are J and K respectively.
Next up!
You know what the keyframes are and how to add and remove them by now. Let’s just get into something a little more complex i.e. Keyframe Interpolation and Different Types of Keyframe in After Effects. These advanced concepts have been thoroughly explained in these articles listed below. So grab a cup of coffee, play your jam and dig right in!
Related Content:
Want more on Keyframes? Check out more of our awesome related articles below
Ready to Learn After Effects?
We offer live online short workshops (2 to 5 Days) and bootcamp courses (8 to 12 – Weeks) to learn this amazing application. Whether you’re an absolute beginner or a seasoned professional, we’ve got a course to level up your skills. Check out our courses below!


